ESP 8266 Microcontroller:

Connecting to ESP 8266:
- Breadboard
- Sensors
- Jumper Wire
There are different ways to program the ESP8266 such as micropython (a subset of python) or using the Arduino IDE.
In this lesson, we will be using the Arduino IDE as it has a simple interface with built-in examples.
Analog to Digital Converter : Analog to Digital Converter (ADC) is used to convert the analog signal into digital form. ESP8266 has an inbuilt 10-bit ADC with only one ADC channel i.e. pinMode(A0,INPUT) , Serial.begin(9600), it has only one ADC input pin to read the analog voltage from an external device. Example:
int variable =0;
void setup(){
pinMode(A0,INPUT);
Serial.begin(9600);
}
void loop(){
variable =analogRead(A0);
Serial.println(variable);
}
How to program an ESP8266 with Arduino GUI?
- Select “File –> Preferences”

- Add http://arduino.esp8266.com/stable/package_esp8266com_index.json to “Additional Boards Manager URLs”
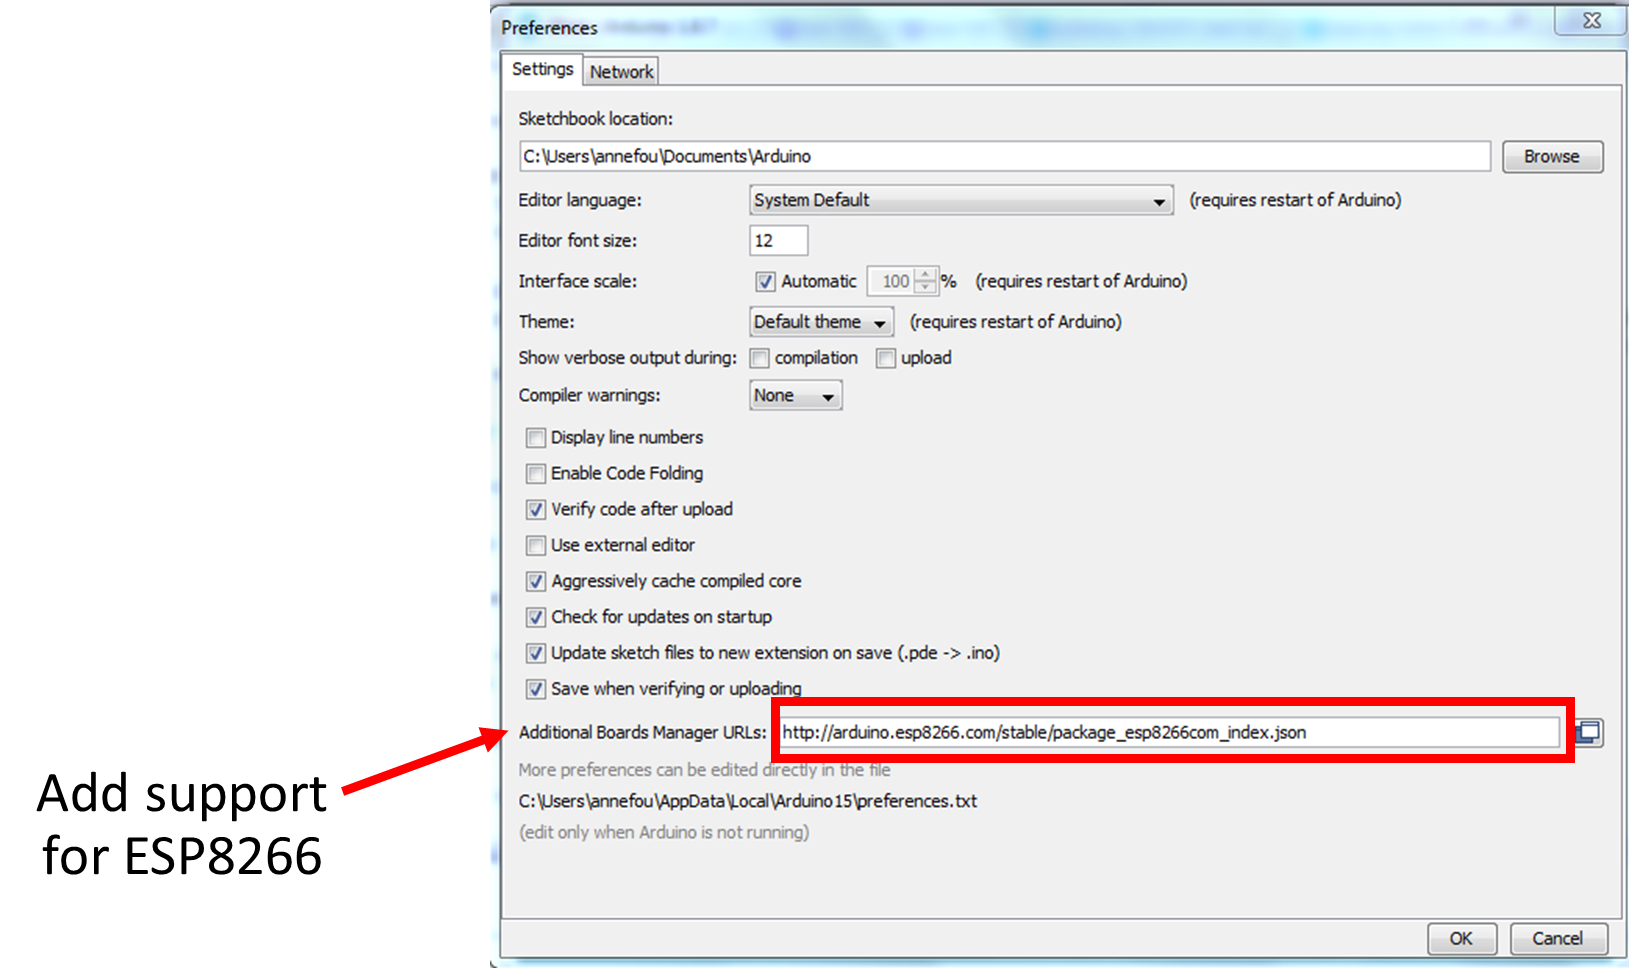
- Click on “OK”
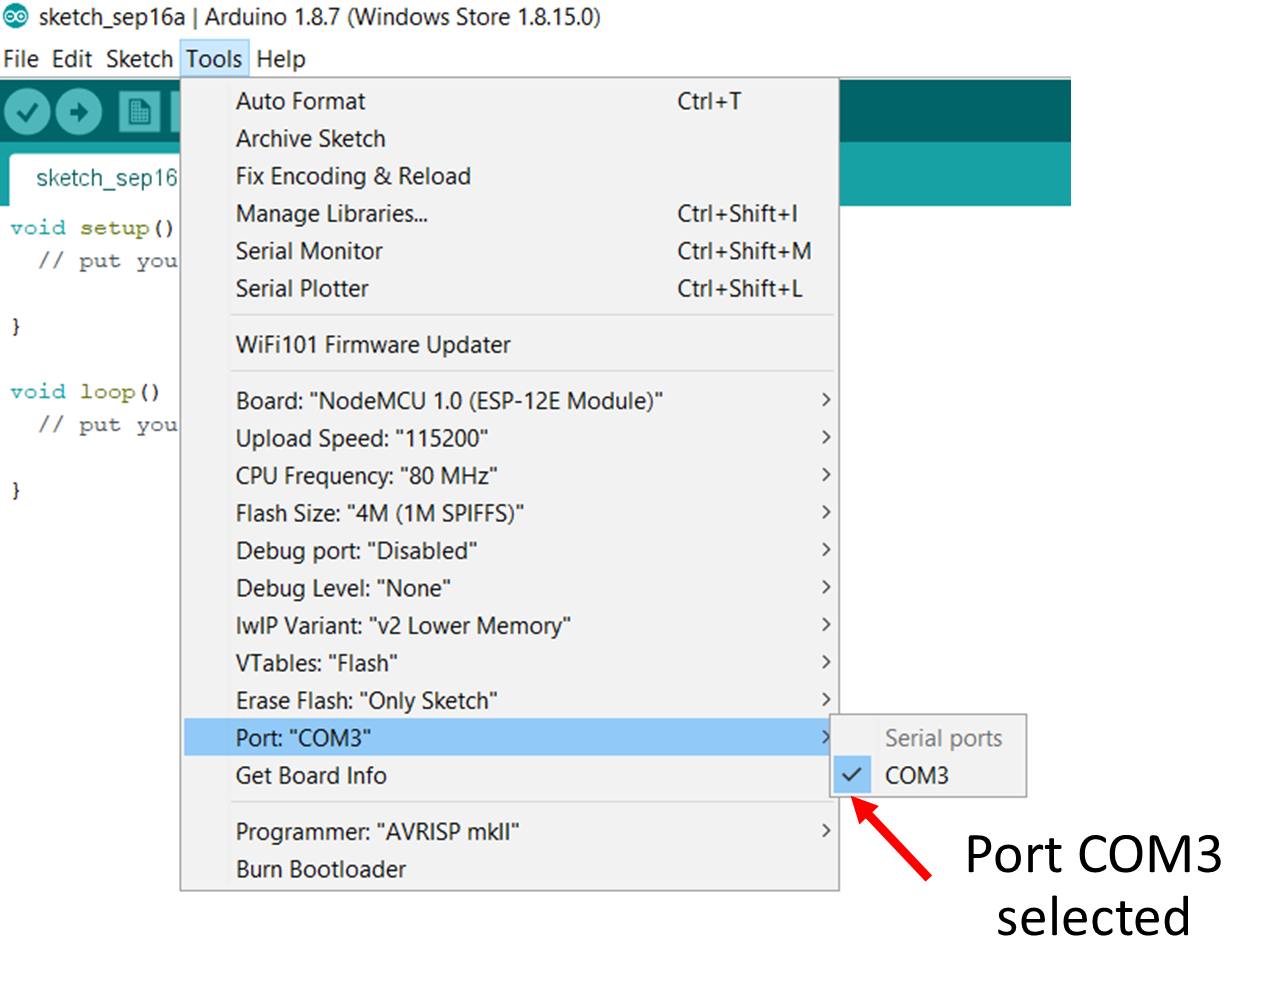
Select Port
Finally you need to select the port (physical USB connector on your computer) to tell the path where the board is physically plugged in your computer.
- Click on “Tools –> Port” and select the corresponding USB port.

- Check you have selected it: when you click again on “Tools –> Port”, you should see a “tick” in front of your selected port (see image below):
- https://drive.google.com/file/d/1DvBg-_MTr-zP-JZKL-eL85bHfqBoP-zt/view?usp=sharing
Comments
Post a Comment